 Our game assets are free because of donations from the community, consider one if you can!

The majority of modern game engines support PBR (physically-based rendering). It is possible to create these maps using expensive and difficult-to-learn software, or you can use photographs. You can, however, draw these textures by hand using free software and basic drawing skills.
To follow along with this guide you'll need either bitmap or vector drawing software. If you want to stick to free software I can recommend GIMP for bitmap drawing and Inkscape if you rather draw using vectors.
It’s always best to draw using vectors because in the long run they’re easier to edit and you can export your texture at any size. The disadvantage is that it’s harder to create organic materials like grass, or high-detail textures. Try both and see which you like best.
Let's get started with the albedo map, which defines the color of your PBR map.
Albedo map
The albedo map defines the colors and pattern of a material, it serves as the color input. If you would create textures for a tank this map would contain the camouflage pattern. Usually albedo maps have to be completely flat and can't contain any shadows or highlights (they get added by the game engine), but in some cases like stylized textures they can be added for extra definition
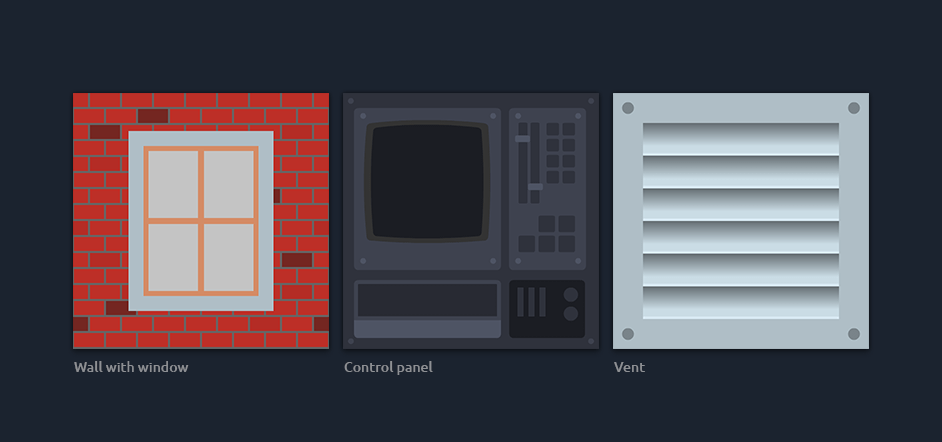
As an example I've created the albedo map of a wall with a window, a control panel and a metal vent. These aren't very exciting by itself, but when we'll combine these with other maps they'll gain artificial depth and reflective properties which make them look realistic in-engine.
Creating an albedo map is simple if you know how basic drawing tools work. Don't use any techniques to add shadows or highlights, that’s up to the game engine to add.
Displacement map
Depending on your engine you can choose a displacement (or height) map or a normal map, or both. The difference between a displacement map and normal map is that displacement maps do physically move the polygons of the model you apply the material to.
Not all game engines support displacement maps however, it can also be performance heavy and models often need to be tessellated (add more polygons) for better results.
When drawing a displacement map everything that's black will have the most depth and white the least (or even extrude from the map). You can use any color in between and gradients allow you to create a wide range of effects.
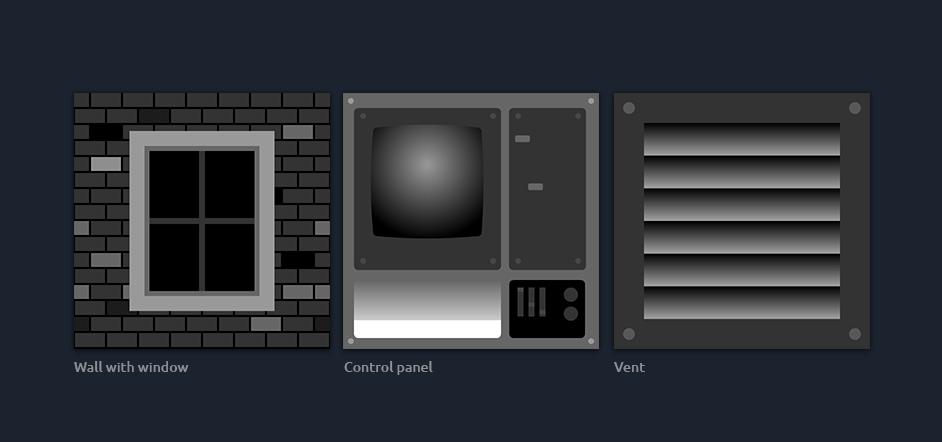
See the image above for displacement maps based on our albedo maps. The glass part of the window has the most depth, while the frame around it is extruded from the texture (because it's light of color). There are also some bricks in the wall that protrude and fall back.
The control panel has a circle gradient on the TV screen which makes it extrude into a round shape, the lower left panel also has a gradient which means it'll look like it's extruded at an angle. The metal vent has the same effect as the control panel which will add depth.
Normal map
Normal maps are used for fine details on textures, like screws and scratches. The depth it adds is an illusion which means the polygons of your models aren't modified, there's no actual depth. To achieve the best depth effects you'll have to combine a normal map, displacement map and changing the polygons of your model.
Drawing a normal map by hand is extremely difficult and not really worth the time. There are online generators which create a normal map based on a displacement map.
Specular map
Specular maps let the game engine know how shiny a surface is. The colors range between white (shiny) and black (matte). You can use a specular map to add details like borders and edges to materials.
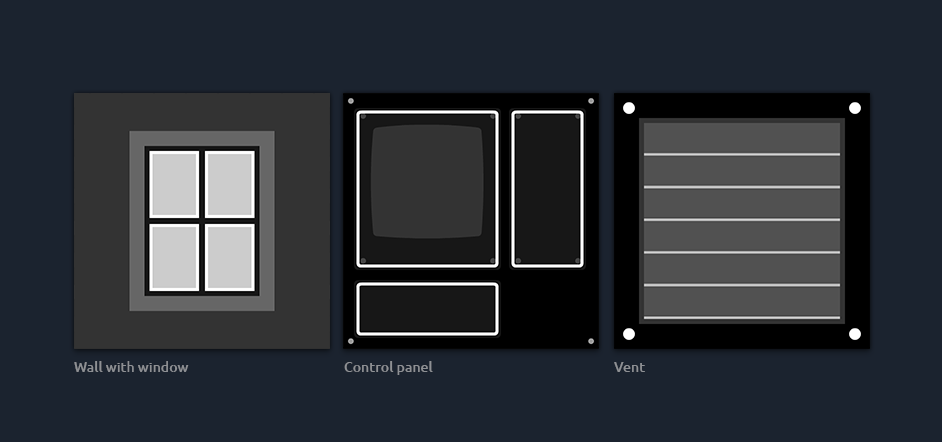
In this case the glass of the window is made shiny. For the control panel each of the panel dividers has a white stroke around the edge to add detail. The vent has shiny screws and white lines to create sharp edges.
Emission map
Emission maps allow you to specify which areas of your textures will be brighter than others. Using such a map you can create effects like windows that light up, or bright light bulbs on a control panel. Especially when combined with a bloom effect this can really enhance the atmosphere of a game.
To create an emission map you'll start by creating a new textures with a black background. Black means that there's no emission, white means there's maximum emission. You can draw any shape or color on the texture to specify what emits light.
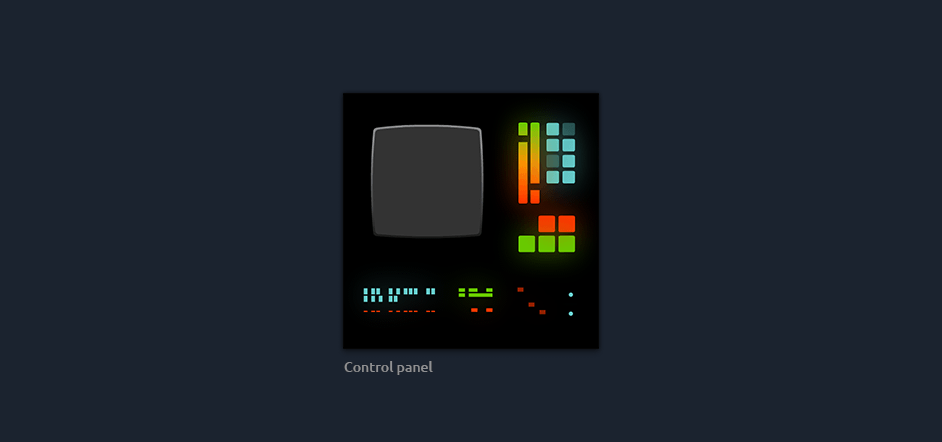
In our case it's only sensible for the control panel to have an emission map, as the others don't emit light by themselves. Simply copy shapes from the albedo or displacement map and color them using bright colors to make them emit light in your scene.
As a fun challenge you can make an emission map for the wall with window texture so it lights up at night!
Results
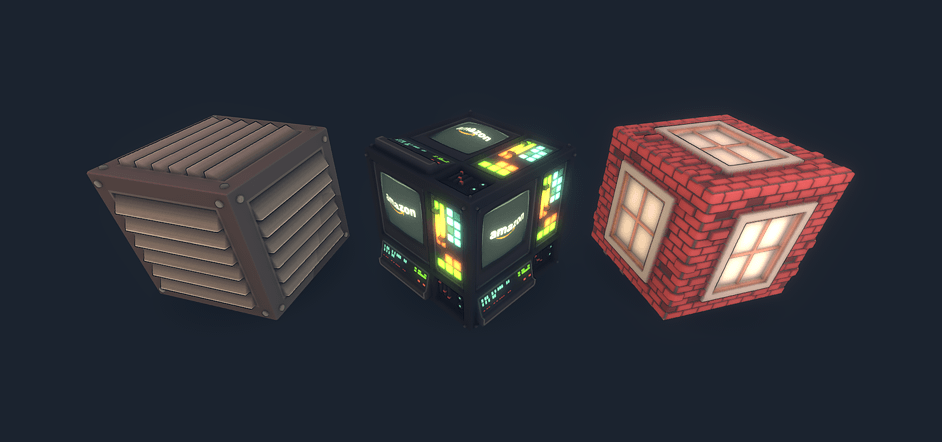
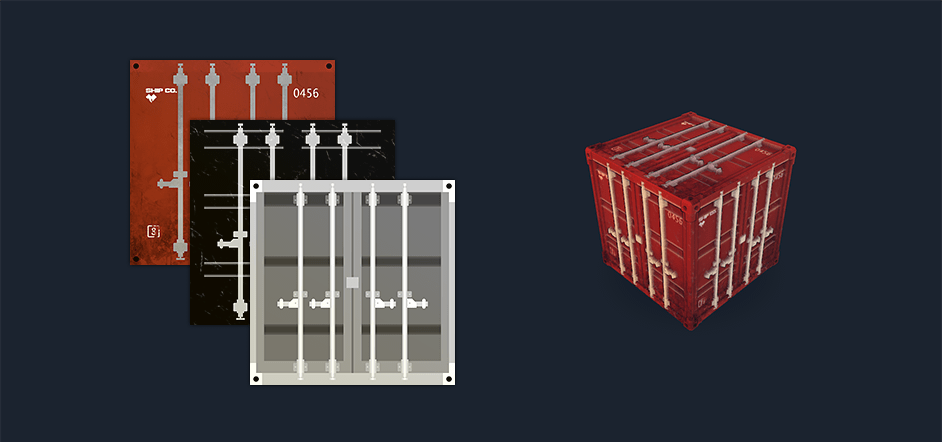
Here's the result of the PBR maps when combined. If your game engine supports it, you can add a bloom effect to make the emission map glow.
Getting the right results is a process of trial and error, so go ahead and experiment with the different maps and effects until you get the desired result. Every game engine is different and might handle PBR maps differently, so make sure to tweak settings and try different shaders for the best results.