 Join the Kenney community on Discord! 💬
This article will give tips about using the Input Prompts package in your game. The package itself is completely free to use, it's CC0 licensed and can be used under any circumstance.
File formats
All of the input prompts are available as both PNG files (bitmap) and SVG files (vector). Some game engines like Godot support SVG and render them as sprites in your game, this is recommend as it'll allow you to dynamically change the size of icons.
If the game engine you've chosen doesn't support vector, you can use either the default size (64×) or the double size (128×) bitmap icons.
Editing and converting
You can use image manipulation software to convert the files to other file formats or sizes. Bitmap files can be opened using free software like GIMP, for vector files Inkscape is recommended.
Displaying input prompts
Keeping it simple
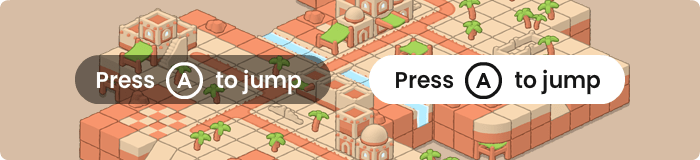
Avoid adding unnecessary text to input prompts. Players will often get a lot of instructions or might not be familiar with the input device they're using, keep the prompts short and easy to understand.

Leave some room around icons to achieve a more calm and minimalist design. It's important to make sure the input prompts are clear and easy to read, but ultimately you'd want players to focus on the game itself instead.
Colors and contrast
Some of the included input prompts already contain color, but most of the basic icons are completely white. This makes them perfect to be recolored to better fit your game.
Most game engines will also allow you to change the color of a sprite in-game, making it much easier to display the input prompts in a color that gives the most contrast against the background. If your game is brightly colored, it might in some cases be better to use dark icons or provide them with a dark background or outline.
Adding flairs
You can use the included flairs to indicate that a button might be unavailable, or give specific directions on how a button combination can be used. These can be layered using basic image manipulation software (like Inkscape), or by rendering multiple sprites in the game engine directly.

Additional characters
If your game allows for rebindable inputs there's a chance that players might use keys that aren't included in the package, like the Ñ or Ç. Unfortunately it'd be nearly impossible to add all these characters into the set as individual sprites. The recommended solution is to use one of the included blank keyboard keys and rendering text on top of that. That way you can support each character that the font you've chosen supports.
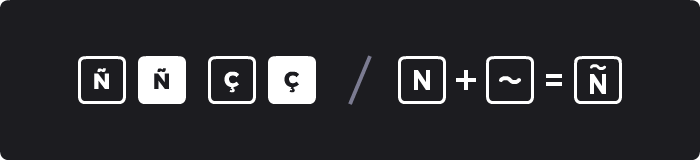
You can also combine multiple characters included in the set, to create new characters that perfectly fit the already included ones.
Console certification
Each of the console requirements were researched thoroughly making sure that the icons will pass certification. In some cases, it might fail. It can still happen that your game may not pass certification because of the usage of input icons, make sure to adhere to the developer documents the manufacturer provides. It is also recommended to take a look at released games on Game UI Database to get a better understanding on how icons are used.
If your game doesn't pass certification because of the design of an icon, let us know and we'll get it fixed.